Backpack Dipole Kit
last updated 25 March 2025.
This is a more detailed description of the dipole kit I described in the Backpack Antennas article.
My requirements at the time were:
- Covered all 5 pre-WARC HF bands (80m, 40m, 20m, 15m, and 10m)
- Capable of covering both ends of the 80m / 75m band (3.5 – 4 MHz).
- Permits changing bands without modifying the antenna.
- Did not need an antenna tuner.
- My operating interests were more rag chewing and meeting the locals rather than DXing.
- Reasonably efficient, for use at 2 – 3 watts.
- Reasonably light weight for backpacking.
- Reasonably small for international flights and baggage.
- Low cost.
- Simple, easy, no field adjustments.
- Adaptable to a wide variety of situations.
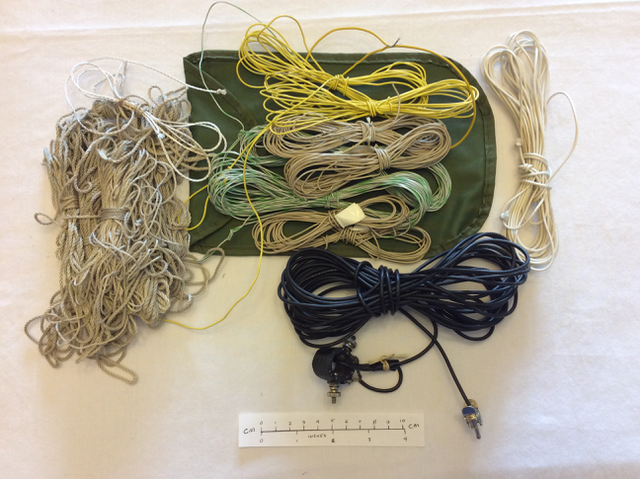
My solution was a “dipole kit”: basically, a length of feedline with dipole wires for each band of interest. When I set it up, I can choose any band, or combination of bands, to suit the situation. For example, if I am just stopping for lunch, I might only operate a single band, such as 20m or 10m. For an overnight camp I might use 40m and 80m. Or I can put up all bands at the same time, and switch among them from the comfort of my sleeping bag. Adding other bands is just a matter of cutting more pieces of wire.
I chose 2.5mm ( 0.1 inch ) diameter RG-174 (or RG-316) 50 ohm coax to match the dipoles. The losses in an 8m (25 foot) length are acceptable for the added height that it permits. My first attempt used speaker cable (with a characteristic impedance around 140 ohms), but it transformed the antenna impedance in ways that the rig didn’t want to match easily, and losses were slightly higher than with the RG-174. I have another 8m (25 foot) extension that I can carry and use when I think I will have more height, but I find that my antennas are typically up around 5m (15 feet) or less when backpacking.
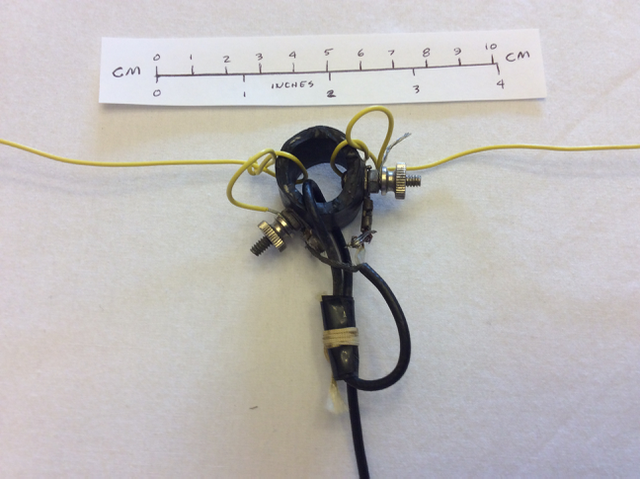
The center insulator is permanently connected to one end of the coax. It was made from a slice of water hose, with the wires tied through the center hole for strain relief, then the ends are secured with thumb nuts to make the electrical connections. The coax shows somewhat higher losses after many years because I didn’t seal it from the rain.

For wire I used 0.6mm (AWG #22) stranded, insulated hookup wire. Two 30m (100 foot) spools were sufficient for most of the wires, but that meant that the two wires for a band were different colors. If you have the option, use a different wire color for each band instead – that makes it much easier to get the right pair of wires! As I rebuild the kit (after 40+ years!) I’m switching to 0.4mm (AWG #26) wires instead to save a bit of weight and space, and will likely add wires for 30m and 17m. I don’t recommend solid wires, especially magnet wire, as it is much more prone to kinking and breaking.
I’ve used a number of different types of rope, but mostly twisted Mason’s Twine, as it is light and inexpensive. Now I might use more braided twine, and/or a slightly thicker rope that is easier for aging eyes to untie. There are several 3-10m (10-30 foot) pieces for raising the feedpoint and tying off the ends of the dipoles, and a I make sure I have one piece of tightly braided line for throwing over tree branches, where the smooth finish reduces friction and makes it easier to get the throwing rock back down to the ground. (A small bag or old sock to fill with sand when there are no rocks available might be a good addition.)
I tuned up the dipoles for minimum SWR in a local park, then I just strung them up and used them with no adjustments in the field. That’s not to say that the SWR was always 1 : 1, but it was low enough. Note that I’m comfortable tying knots, so adding the wires to the center insulator was pretty quick. If you aren’t, then you might look at using fishing swivels or other small clips for the mechanical connections.

Note that everything in the kit is wound in a figure-of-eight (like an “8”). This makes a big difference in practice, as it reduces the time spent untangling wires and ropes, and is quick to do (once you learn how).
To cover both 80m (CW) and 75m (SSB), I made a compromise. Since 80m generally wouldn’t be open at the same time of day as 10m or 15m, I cut the 80m wires short and add the 15m wires on the ends for the low end of the band and the 10m wire for the high end. In practice, I often use the 40m wires for 15m. Since then I have developed a way to tune the 80m element across the band by folding back the wires, so I might do it differently next time.
I could use a dual-band dipole element to cover both 80m and 20m in a shorter space, but space generally hasn’t been a problem when backpacking, and the loading coils don’t pack in as small of a space as wire does.
Most of the places I go have trees, so I don’t carry a separate mast. Sometimes I have to get creative…
Adaptability is difficult to measure, but I have used this dipole kit in many different ways. In VK6 I had the center propped up on a stick 1 m (3 feet) above the rock ledge I was camped on. In ZL3 I used one 40m dipole wire to make a full wave loop for 10m on top of a cliff. It has been strung between rocks on a mountain top and piles of road gravel in a valley, hanging from a flagpole on an island in Maine (W1) to report a damaged boat, and from a palm tree on a beach in KH6, or a vertical dipole over salt water at a lunch stop in VK7.
There were a number of factors that led me in this particular direction. Other builders with different needs or operating preferences may make different choices, such as a linked dipole, or some sort of vertical. I used whatever materials I had available at the time, and I expect that you will do the same if you build a kit. I now use the same idea for my Portable Dipole Kits, but with somewhat heavier materials (such as RG-58 coax cable) for when weight is not as critical. It makes a very simple and inexpensive kit to have ready to go for trips or experiments.